
CO2 lasers are used in a variety of industries, including the manufacturing and medical fields. They're also used by hobbyists for a wide range of projects and applications.
In order to use your CO2 laser engraving safely and effectively, it's important that you know how to restore factory settings if something goes wrong with your equipment. This article will explain why factory settings are important and provide instructions on how to restore them if needed.
Why factory settings are important ?
Calibration: CO2 lasers require precise calibration to ensure that they are operating at their optimal output power and beam quality. Restoring factory settings can help ensure that your laser is calibrated correctly and is producing the intended output.
Safety: CO2 lasers can be dangerous if not properly configured and operated. Restoring factory settings can help ensure that your laser is set up according to industry safety standards and regulations.
Compatibility: If you are using your CO2 laser in conjunction with other equipment, such as a computer or other machinery, restoring factory settings can help ensure that it is compatible with the other equipment and functioning as intended.
Troubleshooting: If you are experiencing issues with your CO2 laser, restoring factory settings can help you troubleshoot the problem. By starting with the original factory settings, you can eliminate any custom configurations or settings as the source of the problem and narrow down the issue.
Warranty: If your CO2 laser is still under warranty, restoring factory settings may be required before you can receive warranty service or support. Manufacturers may require that you restore the laser to its original state before they can assess and repair any issues.
Guide for restoring the factory settings

To restore the factory settings for your Monport CO2 laser, you can follow these steps:
Turn off the laser: Before making any changes, turn off the Monport CO2 laser and unplug it from the power source to prevent any electrical accidents.
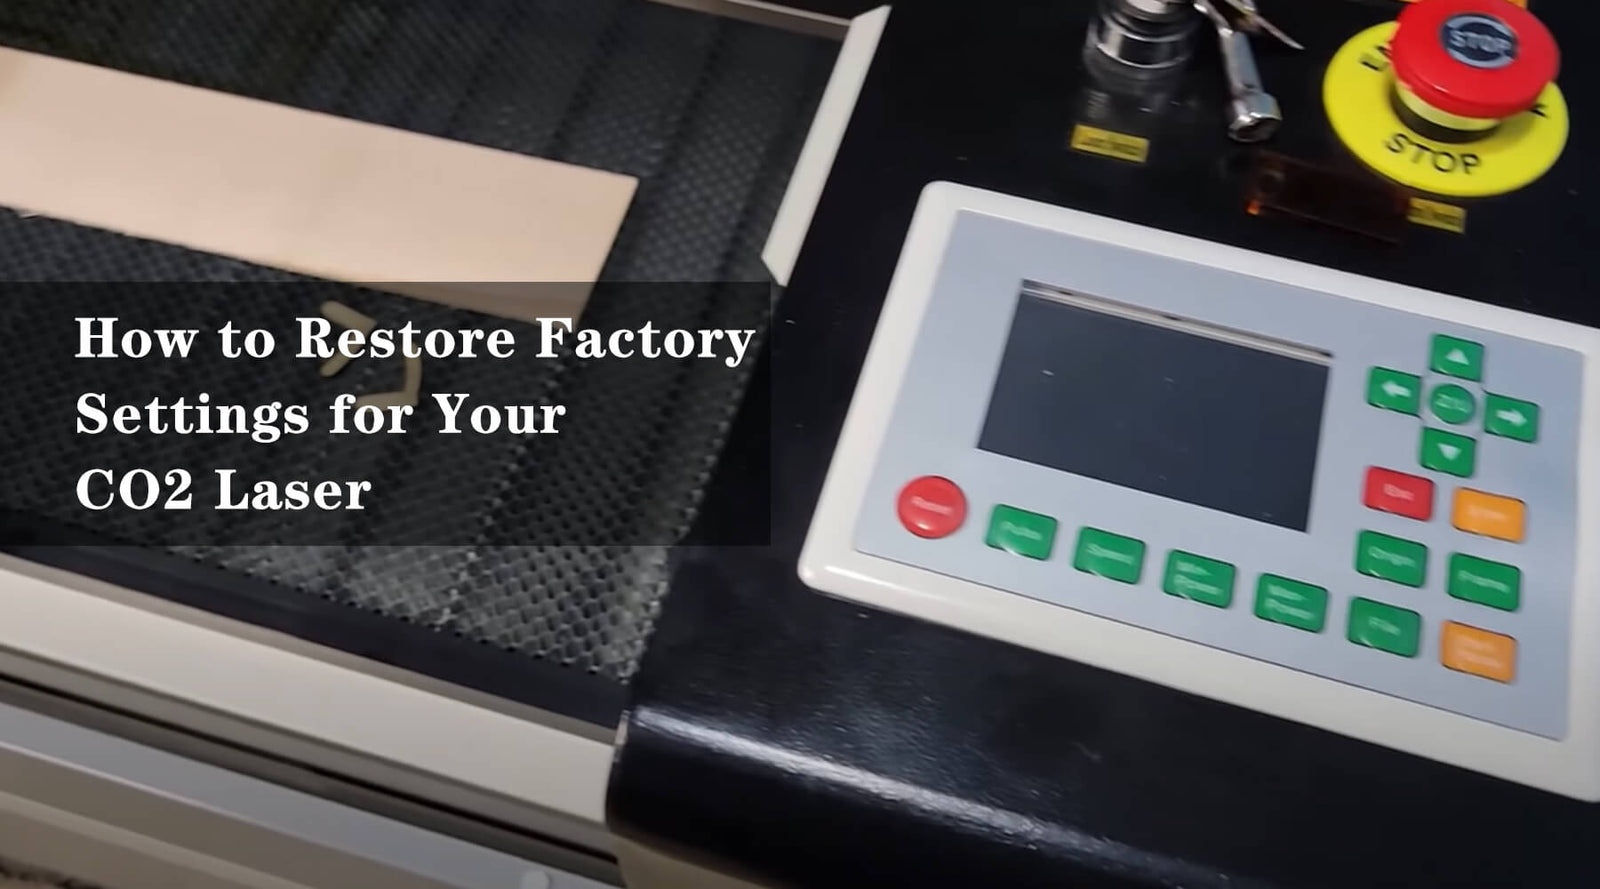
Locate the control panel: The control panel is where you can access the settings for your laser. For the Monport CO2 laser, the control panel is typically located on the top of the machine.
Enter the password: To access the reset feature, you will need to enter a password. The default password for the Monport CO2 laser is usually "8888". Enter this password using the numerical keypad on the control panel.
Select "System Setup": After entering the password, you should see a menu on the control panel. Select "System Setup" from the menu using the arrow buttons.
Select "Factory Reset": Within the "System Setup" menu, look for the option to perform a factory reset. This option may be labeled "Factory Reset" or "Default Settings". Select this option using the arrow buttons.
Confirm the reset: After selecting "Factory Reset", the control panel should display a message asking you to confirm the reset. Select "Yes" to confirm.
Wait for the reset to complete: The Monport CO2 laser will take a few moments to reset to the factory settings. Do not turn off or unplug the machine during this time.
Test the laser: Once the reset is complete, test the laser to ensure that it is functioning properly. Start with low power settings and gradually increase to the desired power level.
Conclusion
If you encounter any issues during the restoration process, refer to the user manual for troubleshooting tips or contact Monport technical support team.