Have you ever wanted to preserve a precious memory in a way that lasts forever? One popular method is photo etched in glass. This technique, coupled with engraving glass, allows you to create stunning, permanent images on glass surfaces. With the right tools, like the Monport 60W CO2 Laser Engraver & Cutter (24" x 16") with Autofocus, you can easily achieve this at home or in a professional setting. In this article, we'll explore the process, tools, and tips for creating beautiful etched glass pieces.


What is Photo Etched in Glass?
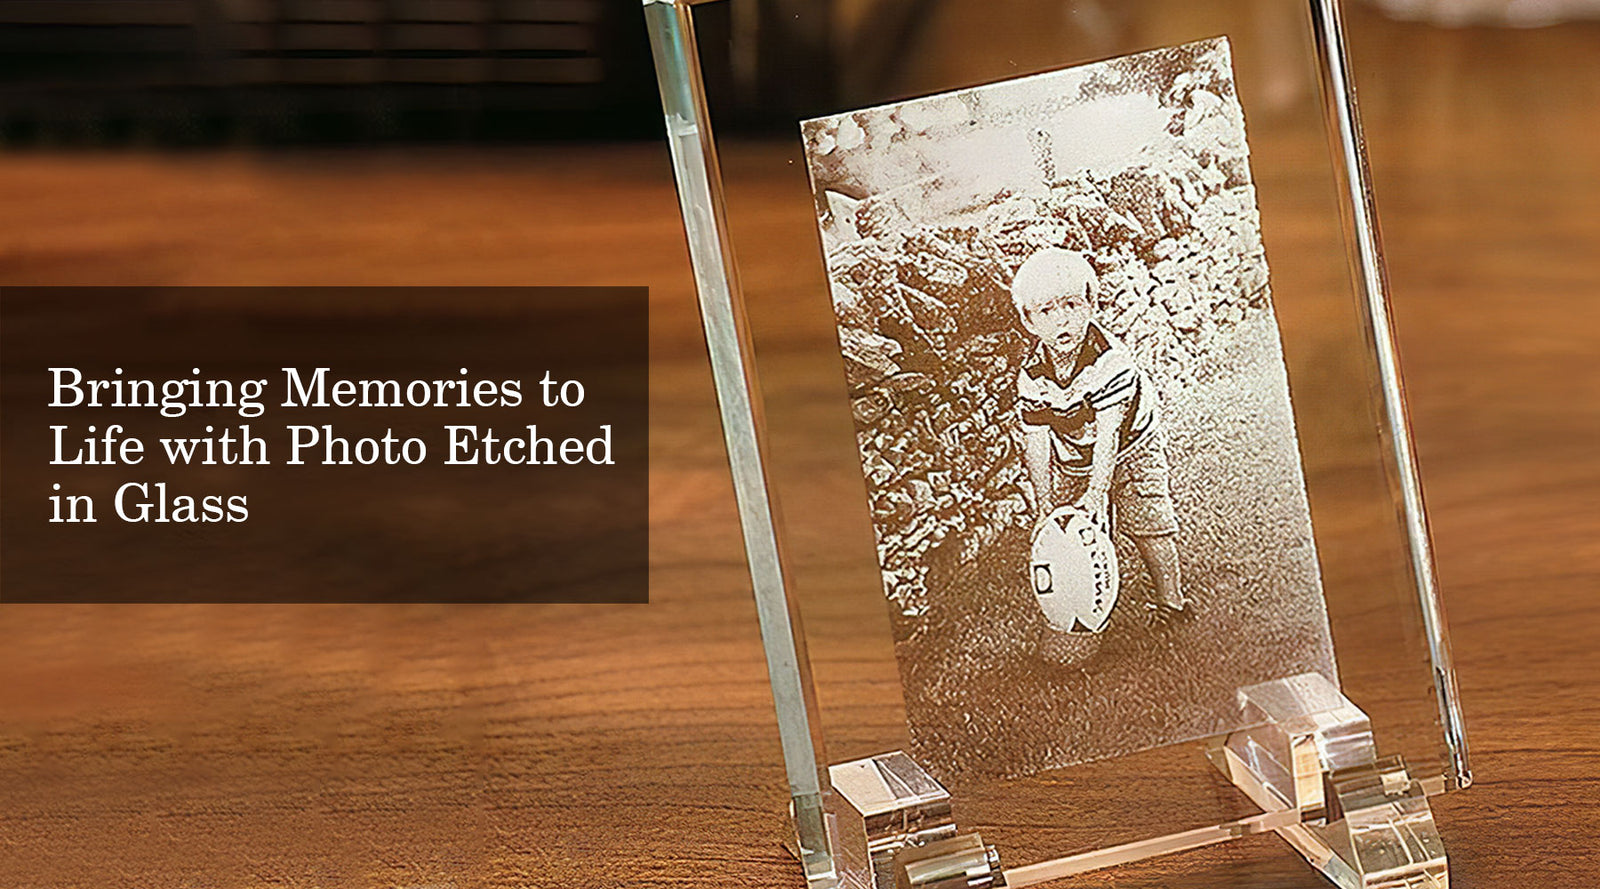
Photo etching in glass is a technique that transfers a photographic image onto a glass surface. Using a laser engraver, the photo is etched into the glass, creating a detailed, permanent design. This method is perfect for creating personalized gifts, memorial pieces, or decorative items.
Table: Advantages of Photo Etching in Glass
| Advantages | Description |
|---|---|
| Durability | Etched designs are permanent and resistant to wear. |
| Customization | Any photo can be used, offering endless possibilities. |
| Aesthetic Appeal | Creates a sophisticated, elegant look on glass. |
| Versatility | Suitable for various glass items, from frames to trophies. |
The Process of Engraving Glass
Engraving glass involves using a laser engraver to carve designs or text into the surface of the glass. The Monport 60W CO2 Laser Engraver & Cutter is an excellent tool for this job, providing precise control and high-quality results.
-
Prepare Your Image: Choose a high-contrast photo for the best results. Convert the image to black and white and adjust the brightness and contrast to ensure the details are sharp.
-
Set Up the Laser Engraver: Load the image into the laser engraver’s software. The Monport 60W CO2 Laser Engraver & Cutter, with its autofocus feature, makes this process simple and ensures the laser is properly aligned.
-
Engraving Process: Place the glass piece in the engraver. Adjust the settings based on the glass thickness and type. Begin the engraving process, which may take a few minutes depending on the complexity of the design.
-
Finishing Touches: Once the engraving is complete, clean the glass with a soft cloth to remove any residue. Your photo etched in glass is now ready to be displayed!

Bullet Points: Key Features of the Monport 60W CO2 Laser Engraver
- Autofocus Feature: Ensures precise laser focus for detailed engravings.
- 24" x 16" Work Area: Large enough to handle various glass sizes.
- Easy-to-Use Software: Compatible with popular design programs for seamless operation.
- High Precision: Delivers sharp, clear engravings every time.
Applications of Photo Etched in Glass
There are countless ways to use photo etched in glass and engraving glass to create unique, memorable items.
- Personalized Gifts: Etch family photos, wedding pictures, or baby portraits onto glass frames or plaques.
- Memorial Pieces: Create lasting tributes by etching photos of loved ones onto glass keepsakes.
- Decorative Art: Transform ordinary glassware into stunning art pieces with custom designs.
- Corporate Awards: Engrave logos and text onto glass trophies for a professional, elegant look.

FAQs: Common Questions About Photo Etched in Glass
Q: Can I use any photo for etching in glass?
A: Yes, but high-contrast, black-and-white images work best for clear, detailed results.
Q: What type of glass is best for engraving?
A: Clear, tempered glass is ideal as it is durable and provides a smooth surface for engraving.
Q: How do I clean the glass after engraving?
A: Use a soft cloth and glass cleaner to remove any dust or residue without damaging the engraving.
Q: Is laser engraving safe for all types of glass?
A: Most glass types can be safely engraved, but it’s important to adjust the laser settings according to the thickness and type of glass.

Important Details to Remember
- Safety First: Always wear protective eyewear when operating a laser engraver. Ensure your work area is well-ventilated.
- Image Quality: High-quality images lead to better engravings. Take time to prepare your photo for the best outcome.
- Proper Settings: Adjust the laser engraver’s settings according to the type of glass you are working with to prevent cracking or uneven engraving.
- Cleaning Up: After engraving, make sure to properly clean your glass piece to enhance the clarity of the design.

Takeaways: Key Points to Consider
- Photo etched in glass is a beautiful way to preserve memories.
- The Monport 60W CO2 Laser Engraver & Cutter is an excellent tool for both beginners and professionals.
- Proper preparation and settings are crucial for achieving the best results in engraving glass.
- This technique is versatile and can be applied to a wide range of items, from personal gifts to corporate awards.

Conclusion: Create Timeless Keepsakes with Photo Etched in Glass
Photo etched in glass and engraving glass are more than just decorative techniques—they are ways to capture memories and moments forever. With the Monport 60W CO2 Laser Engraver & Cutter, you can bring these memories to life with precision and elegance. Whether for personal use or as part of a business, this method offers endless possibilities for creativity and customization.
